Chapter 1: Welcome to Discounty
Your Journey Begins
1 Character Creation
Welcome to Discounty! Your journey begins with creating your unique character. The game offers extensive customization options:
- Body type selection
- Clothing and outfit choices
- Hairstyle customization
- Pants/bottom wear options
- Facial features
- Shoe selection
Don't forget to give yourself a cool name that represents your supermarket empire ambitions!
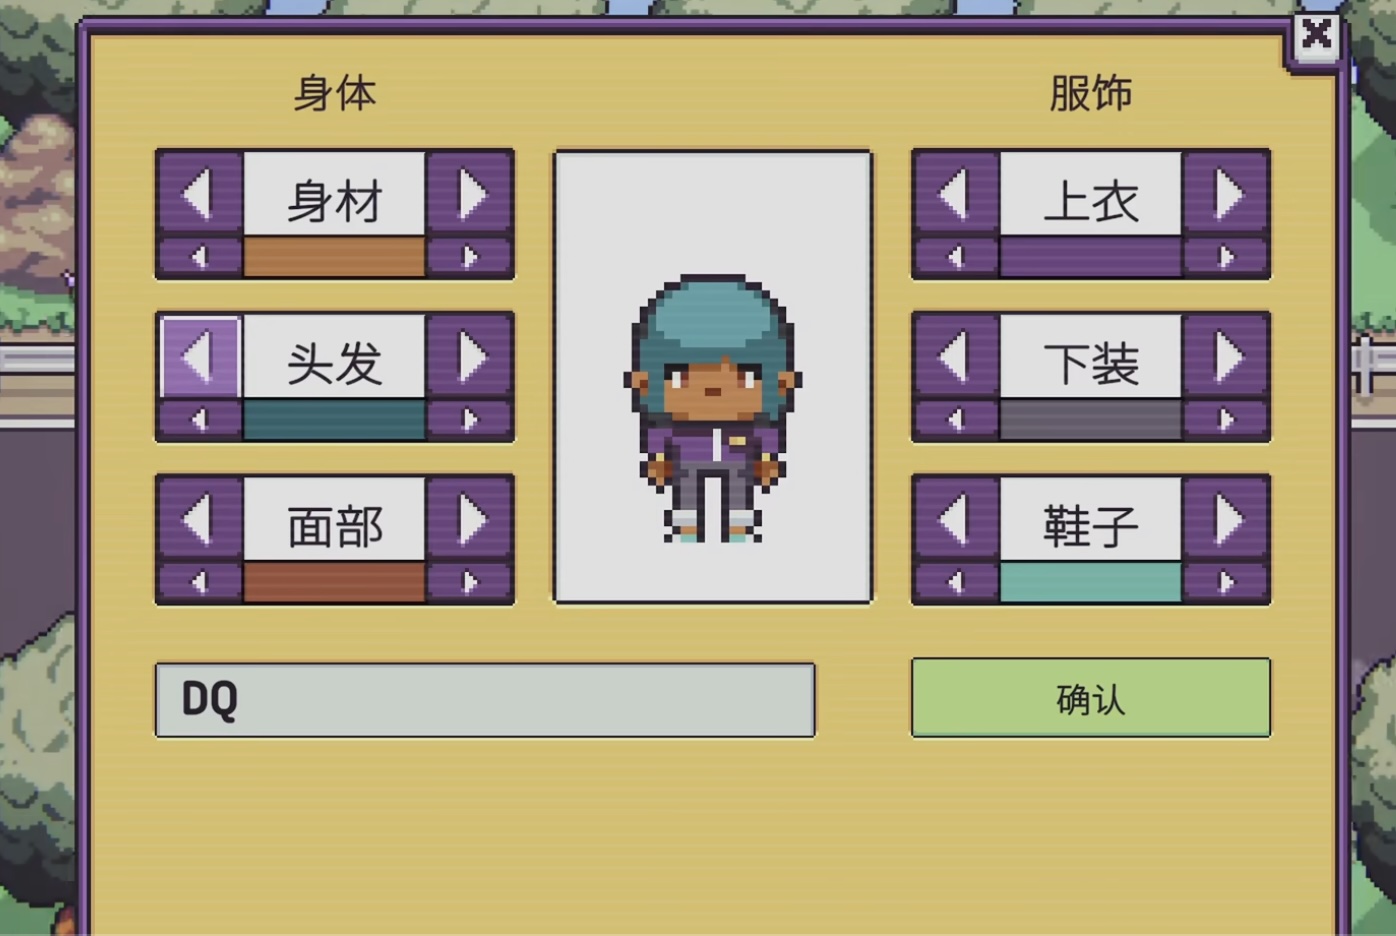
📸 Character Creation Screen
2 Arriving in Town
After character creation, you'll see a bus cutscene. Follow the bus to reach the bus stop. Once you get off, head to the right to find your aunt's house. Your aunt will guide you to the supermarket - your new workplace called "Discounty"!
After showing you the store, your aunt will leave, and it's time to enter the supermarket and begin your retail adventure.
3 Meeting Grace & Getting Your Tools
Walk to the back of the store to meet Grace, the sales manager. She'll handle your orientation and provide essential tools:
🔧 PDA Device
Your personal digital assistant for managing inventory, checking prices, and tracking tasks. Click the popup to view the PDA tutorial.
🎒 Tool Belt
A magical storage device that can hold an incredible amount of items despite its small size - think of it as Doraemon's pocket! Use it to carry and transport goods around the store.
4 Setting Up Shop
Head to the warehouse next door where a delivery person is waiting. Go inside to find shelves ready for placement. Arrange them in your store strategically - this is your first major decision as a store manager!
🛒 Your First Customer
After placing shelves, the store opens for business! Head to the checkout counter to serve your first customer.
💡 Pro Tip: PC players can use the number pad for lightning-fast price calculations!
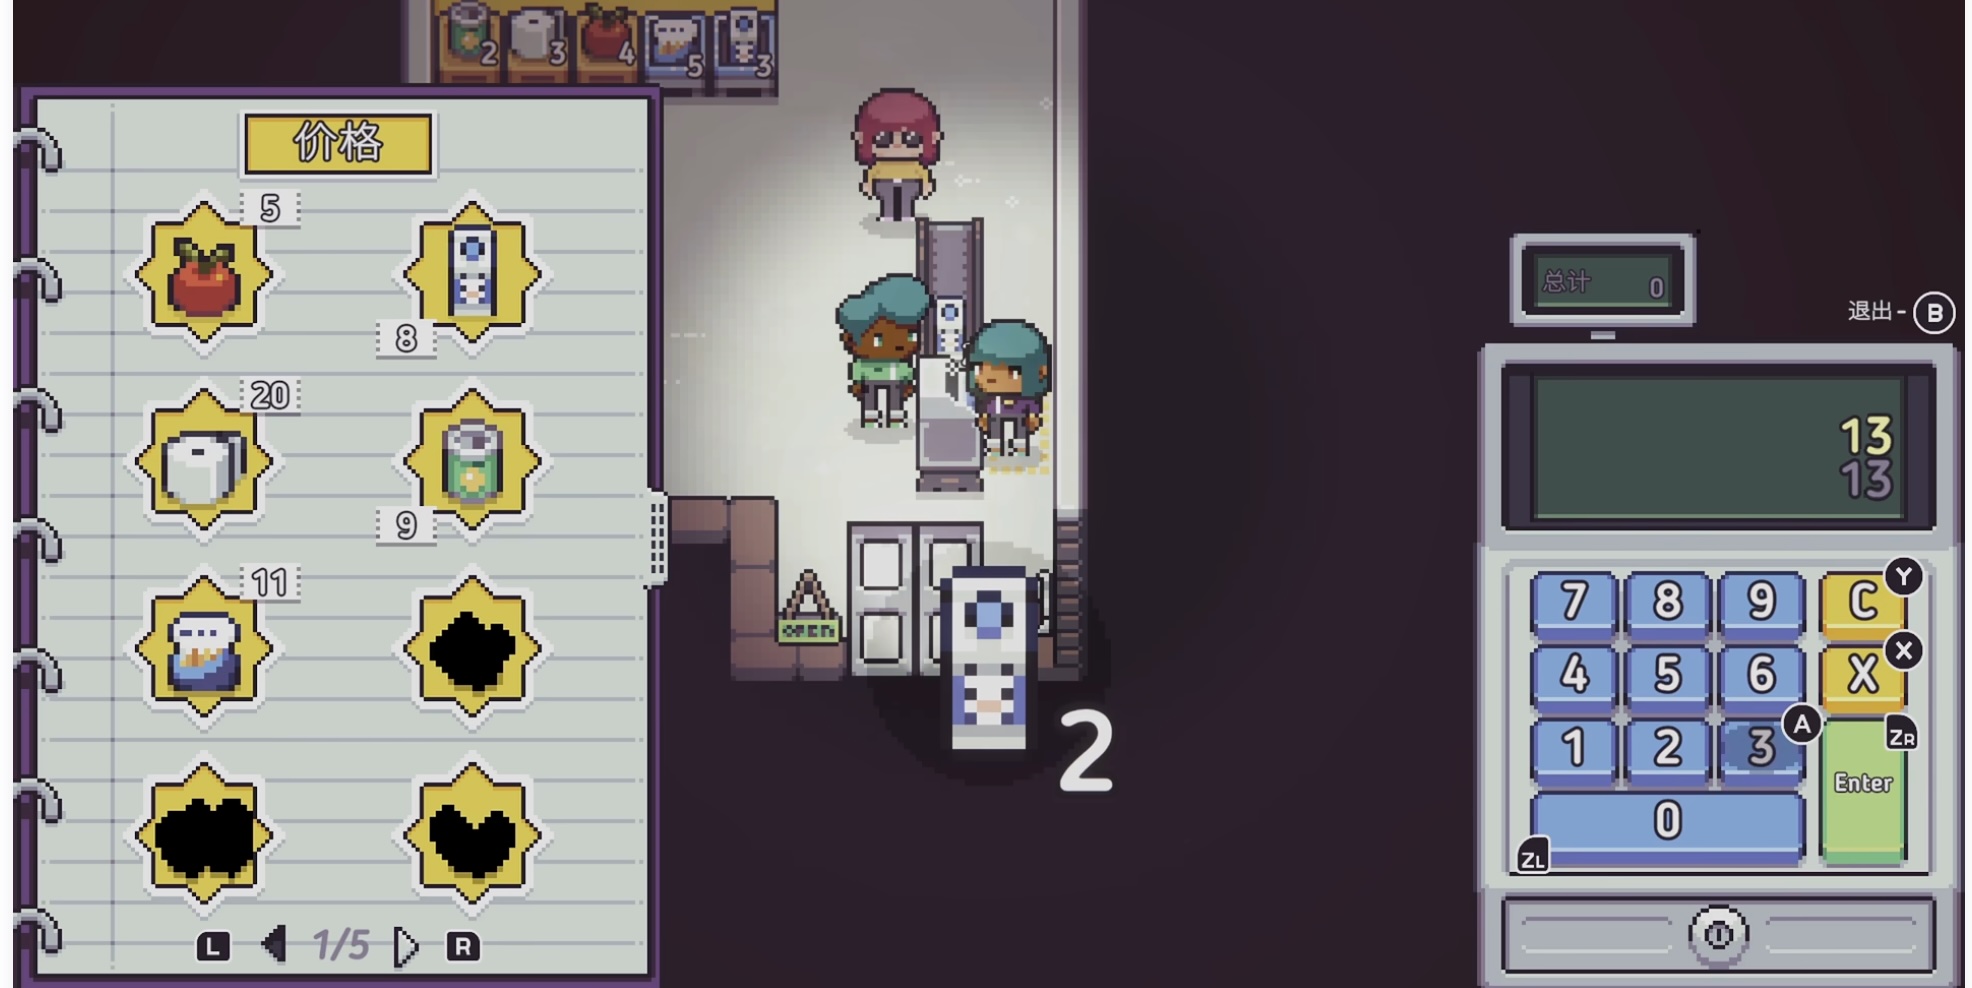
📸 Checkout Counter Interface
After completing the sale, speak with Grace again before leaving. Your aunt will be waiting outside to take you home - a cozy old RV that's surprisingly warm and welcoming inside!
5 Day 2: Poster Mission
Wake up to your first real task: posting three promotional posters around town. You'll also receive a mini-map to help navigate!
📍 Poster Locations:
- 1 Bus Station - Near where you first arrived
- 2 Harbor - Follow the map to the waterfront
- 3 Bar - Check the entertainment district

📸 Mini-map with Poster Locations
6 Grand Opening Preparation
After completing the poster mission, return to the grand opening scene. Grace will give you an electronic watch to keep track of time - you must be ready before the store opens to welcome customers.
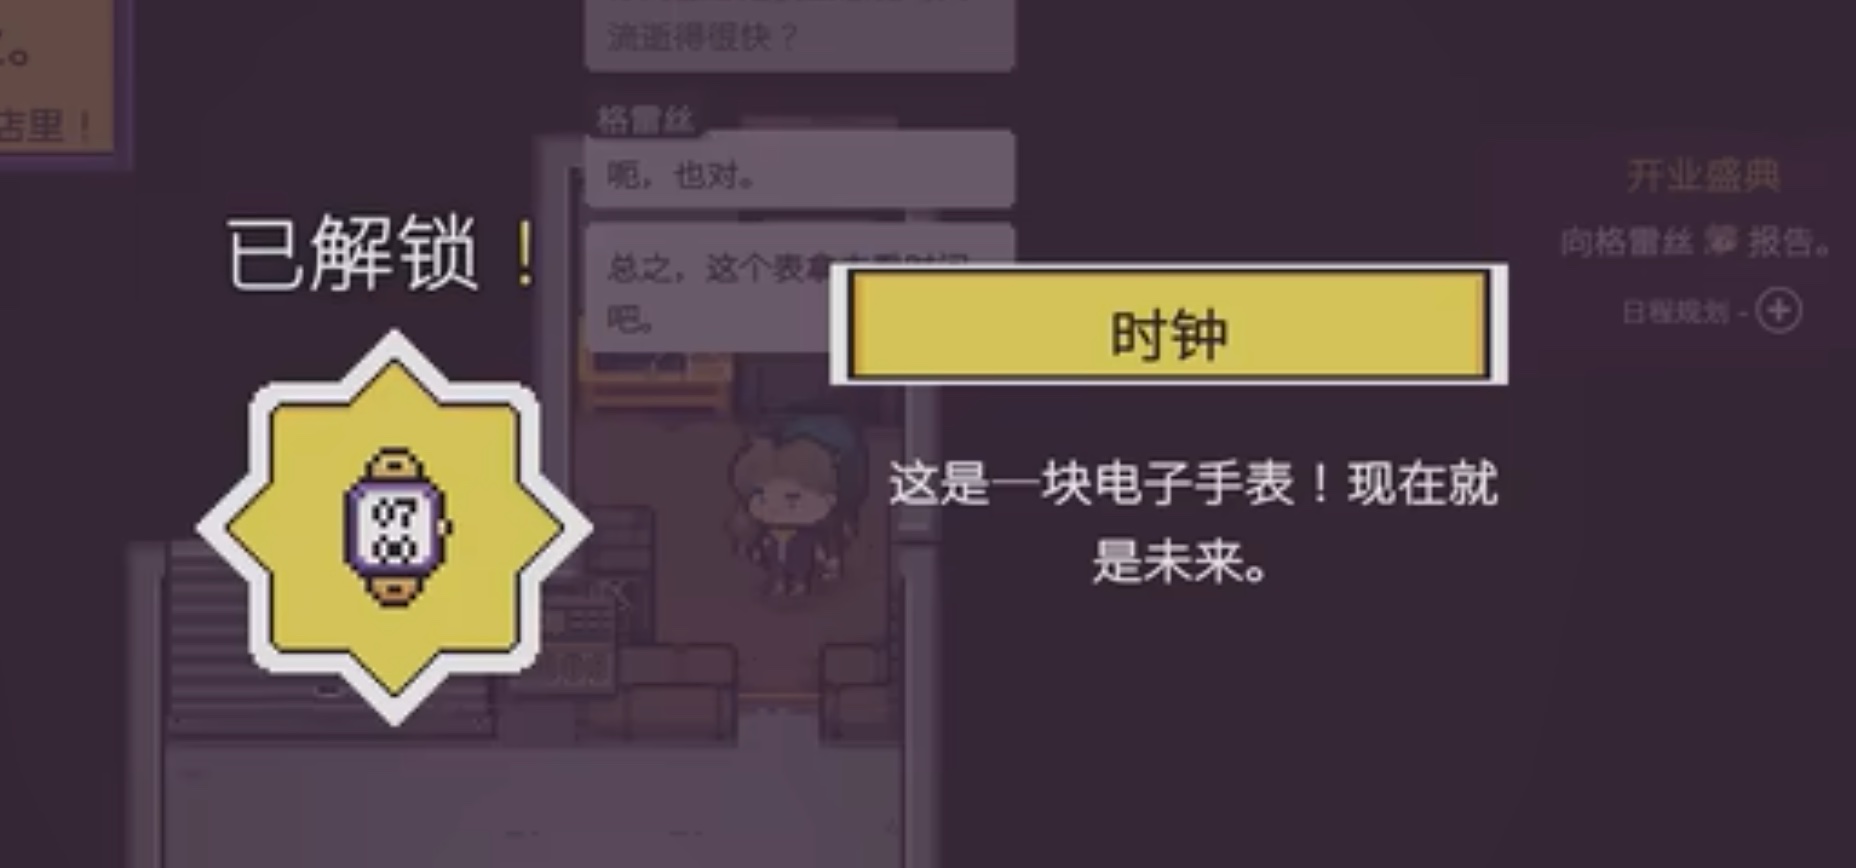
📸 Receiving the electronic watch from Grace
⏰ Business Hours
Get ready for a busy day! The store operates from 8:00 AM to 5:00 PM. You'll experience the full cycle of retail management - from opening preparations to closing procedures.
7 Closing Time Responsibilities
After the store closes, find Grace for your end-of-day tasks. She'll have you use the computer to order additional stock for items running low, ensuring all products remain available.
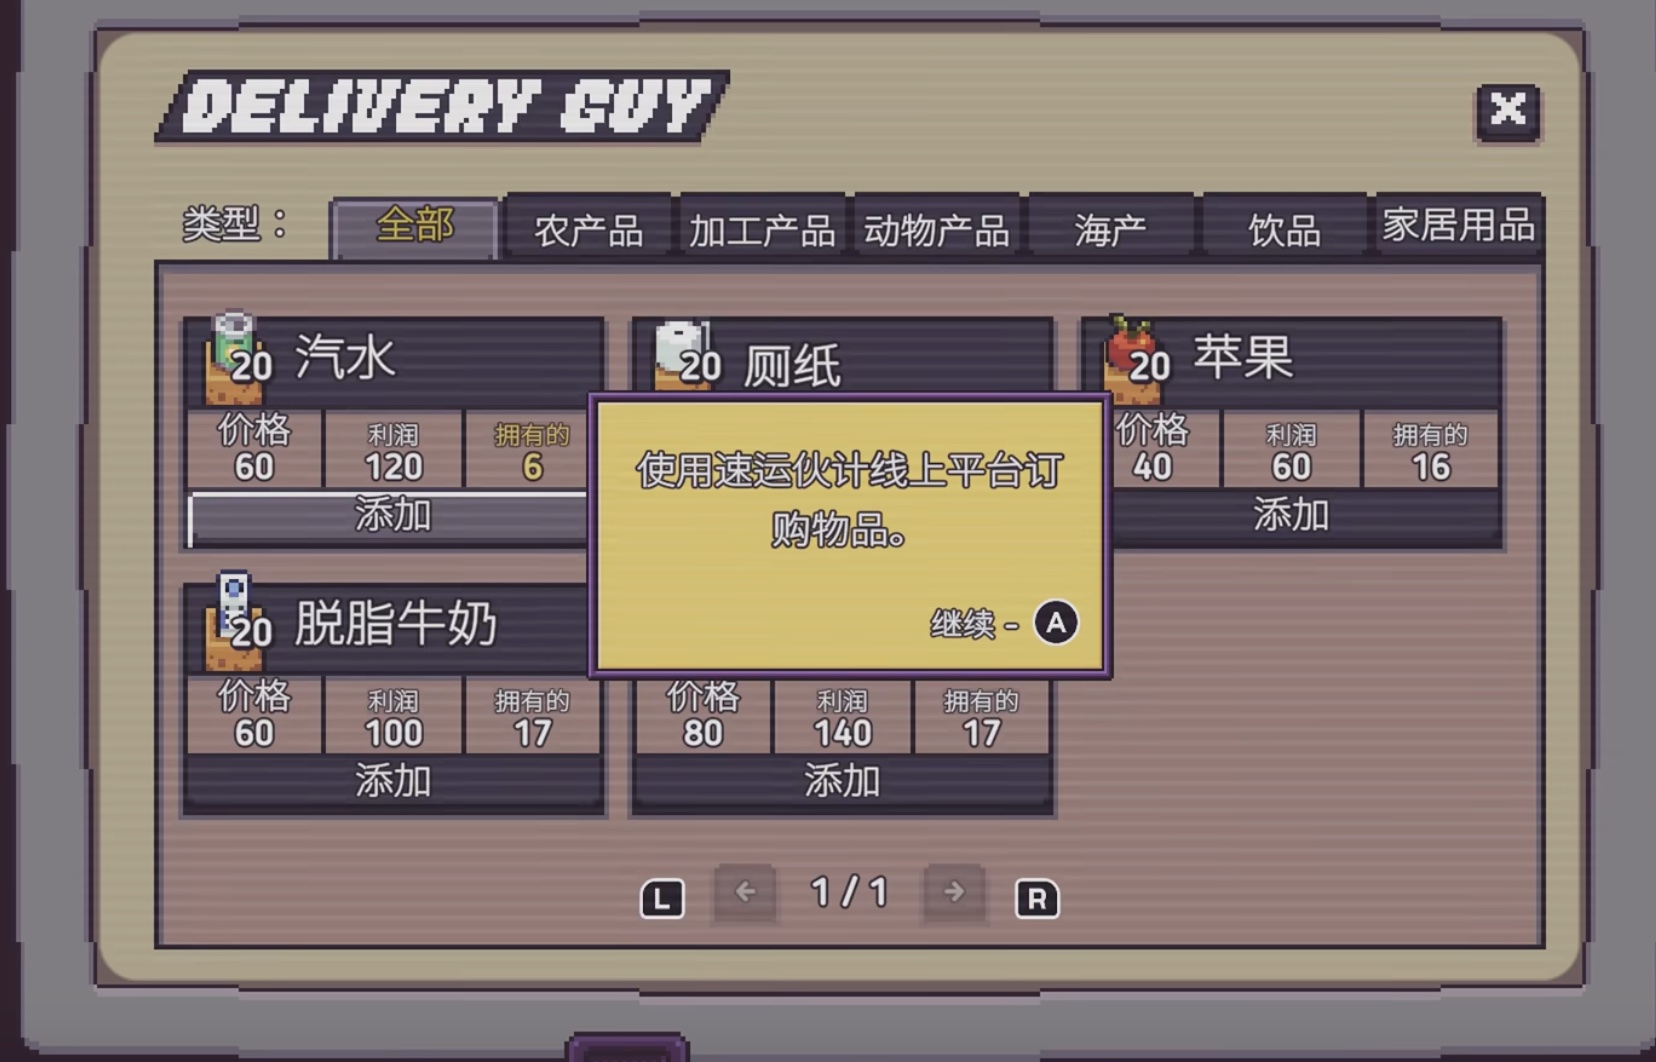
📸 Ordering stock through the computer system
📦 Important: Restock Before Leaving!
Don't forget to replenish all shelves with products before heading home. This ensures the store is ready for the next business day. Once everything is fully stocked, you can clock out and go home.
8 Day 3: Expanding the Store
Wake up to find your aunt waiting outside your RV. She explains that Discounty needs more display fixtures and will take you to Ted Eisenkram's hardware store.
🛒 Shopping List
- • 2 Freezer Units - For cold products
- • 2 Shelving Units - For additional inventory
Make sure to arrange delivery to the store after purchasing!

📸 Shopping at Ted Eisenkram's Hardware Store
9 Installing New Equipment
Once the new shelves and freezers arrive, strategically place them in your store. Stock them with products and prepare for another busy day of operations.

📸 Your expanded store with new equipment
✅ Daily Reminder
Remember to restock all shelves before closing time! This becomes a crucial daily routine that ensures smooth operations and happy customers the next day.
Chapter Overview
📋 Objectives
- ✓ Create your character
- ✓ Meet Grace and receive your tools
- ✓ Set up your first shelves
- ✓ Complete your first sale
- ✓ Post promotional posters
- ✓ Grand opening preparation
- ✓ Handle checkout and calculations
- ✓ Deal with difficult customer
- ✓ Complete Day 2 operations
🎁 Key Items
- • PDA Device
- • Tool Belt
- • Store Map
💡 Quick Tips
- Use number pad for quick checkout calculations
- Don't forget to check all three poster locations
- Save money for future inventory purchases